Plan a Loft Conversion Layout: Step-by-Step
Table of Contents
Step 1: Assess Whether Your Loft Is Suitable for Conversion
Check head height and usable floor area
Inspect the roof structure and load-bearing walls
Step 2: Measure Your Dimensions and Create Initial Loft Conversion Floor Plans
Record head height, roof pitch, and floor joists
Map existing services and access points
Step 3: Choose Your Loft Conversion Type
Step 4: Design Your Layout Around Intended Use and Loft Conversion Staircase Ideas
Start with a head-height contour plan
Test furniture at scale before you commit
Place the staircase first, it is the biggest constraint
Now place the bathroom against the services
Then the bedroom or main room
Finally, storage and circulation
Step 5: Plan Loft Conversion Storage Ideas and Service Integration
Let the soil pipe drive the bathroom position
Water supply, heating, and boiler placement
Electrical first-fix routes
Ventilation: the most commonly under-planned service
Storage that works with the services, not against them
Coordinate with your structural engineer and building control
Step 6: Navigate Planning Permission and Building Regulations
Permitted development rights and when you need approval
Fire safety, escape routes, and insulation requirements
Step 7: Follow the Loft Conversion Process Steps and Get Professional Support
Structural assessment, architect, and building control involvement
Timeline and construction oversight
Frequently Asked Questions
Last Updated: October 14, 2026
Step 1: Assess Whether Your Loft Is Suitable for Conversion

Not every loft can be converted. The first step in planning a loft conversion layout is confirming your space is suitable before investing in drawings or planning applications.
Check head height and usable floor area
Building regulations require 2.2 metres of headroom across at least 50% of the floor area. Measure from floor to the underside of the roof structure at several points; a shallow roof pitch may mean raising the roof, which gets expensive quickly.
Sloped ceilings shrink usable floor area dramatically, so mark out where you can actually stand, sit, and place furniture.
Accurate early measurements prevent costly redesigns.
Inspect the roof structure and load-bearing walls
Check whether your roof is a traditional rafter roof or modern trusses.
Check for load-bearing walls, which support the roof and cannot be removed without extra support.
Note existing services, water tanks, pipes, electrics, ventilation, so you can plan around them.
Step 2: Measure Your Dimensions and Create Initial Loft Conversion Floor Plans
Before you can design your loft conversion layout, you need exact dimensions of the space.
Record head height, roof pitch, and floor joists
Measure head height at the centre, near the edges, and along the length, and record the roof pitch, together these determine your usable space. Check the depth and spacing of floor joists, which affect where walls, stairs, and heavy furniture can go.
Map existing services and access points
Identify where water pipes, soil pipes, and electrical circuits run; they cannot be moved easily, so plan around them. Note the loft hatch position, as an awkward hatch constrains your staircase route. Lofts also need airflow to prevent condensation and damp, so design ventilation in.
Step 3: Choose Your Loft Conversion Type
The type of loft conversion you choose directly affects your layout options.
Bespoke Home Design
Hip-to-gable conversions turn a sloped hip roof into a gable end, creating a full-height wall at one end.
Mansard conversions create a new roof structure with nearly vertical walls, maximum space, highest cost, and careful planning permission consideration.
Each type carries different planning permission and building regulation implications.
Step 4: Design Your Layout Around Intended Use and Loft Conversion Staircase Ideas
Most loft conversions are won or lost here. Work through a fixed sequence, staircase, bathroom, main room, then storage and circulation. Each decision constrains the next, and the right order prevents the redesign loop that pushes projects over budget.
Start with a head-height contour plan
Draw contour lines across your loft plan at 1.5 m, 1.9 m, and 2.2 m. Below 1.5 m is storage only; 1.5-1.9 m suits low furniture, a bed head, a desk against a knee wall, or a bath along its long edge; above 1.9 m is full standing space; above 2.2 m is where building regulations expect minimum headroom across at least half the floor area.
Test furniture at scale before you commit
At 1:50, cut paper templates for the items you own or plan to buy. Standard UK sizes:
Double bed: 1.35 m × 1.90 m (plus 0.6 m clearance on the access side)
King bed: 1.50 m × 2.00 m
Wardrobe (double): 1.20 m wide × 0.60 m deep, needs 0.75 m clear in front to open doors
Slide these around the contour plan. A bed head against a 1.2 m knee wall works; sideways under a 1.0 m slope does not. A wardrobe needs full-height wall behind it, a gable end or dormer cheek, not under the eaves.
Pro Tip Photograph your loft from each corner and print the images. Sketch furniture onto the prints at rough scale. It is faster than CAD at this stage and catches obvious clashes before you pay for drawings.
Place the staircase first, it is the biggest constraint
Three realistic positions, each trading something different:
Over the existing stair (stacked). The new flight sits directly above the existing one, usually cheapest and least disruptive, since the floor opening aligns with the structure below. The trade-off: the loft arrival point is fixed, which can push the bathroom or bedroom into an awkward corner.
Perpendicular to the ridge, rising through the slope. This suits narrow terraces with no gable.
Position | Floor area lost below | Headroom risk | Cost signal | Best for |
Stacked over existing stair | Low | Low | Lowest | Terraces and semis with a central stair |
Along gable, parallel to ridge | Medium | Low | Medium | Semis and detached with a usable gable |
Perpendicular through slope | Medium-high | High | Medium-high | Narrow terraces with no gable |
Whichever you choose, the top landing should be at least 1.0 m deep and 0.9 m wide so doors open without blocking the stair, a cramped arrival is the most common complaint in completed conversions.
Now place the bathroom against the services
Bathrooms are the most constrained room, needing a soil pipe, water supply, and ventilation route.
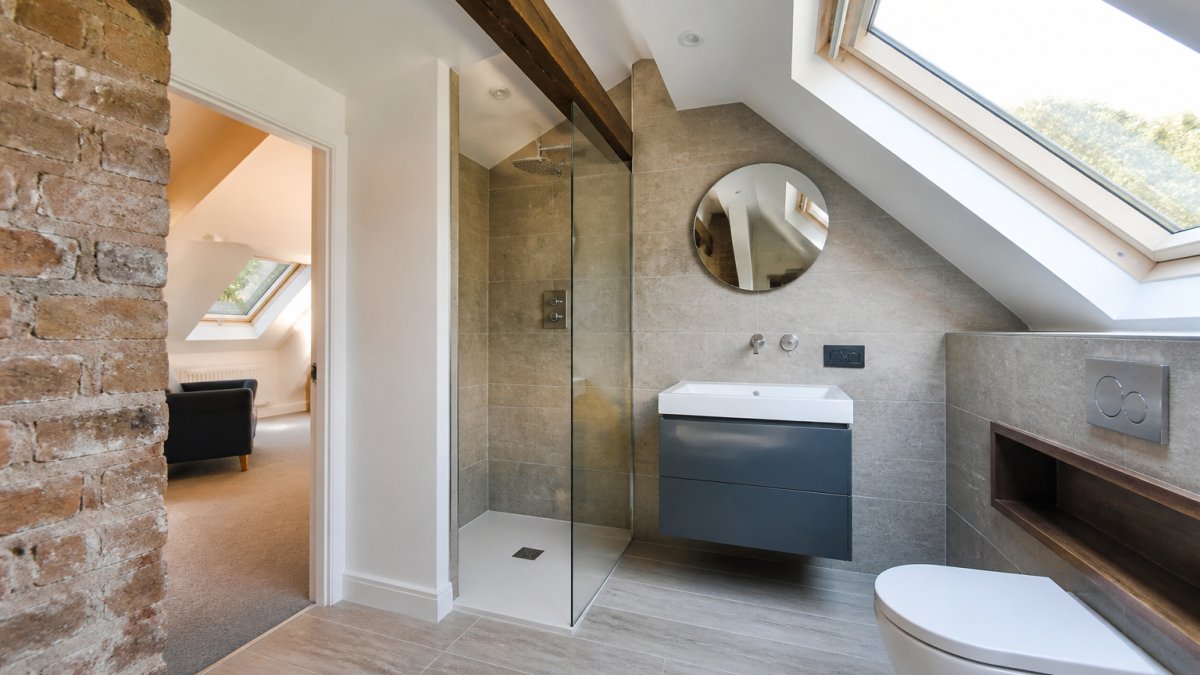
Put the WC and basin under the lower slope if needed, they only need seated and standing headroom. Keep the shower and bath where you can stand upright.
Watch Out Moving a soil pipe more than a short distance, or running it against the fall, adds significant cost and may need a macerator or a pumped solution. Check the existing stack position before you fall in love with a bathroom layout.
Then the bedroom or main room
A double bedroom needs about 3.5 m × 3.5 m of usable floor area, but shape matters more than the number, a long, narrow room with two low knee walls feels smaller than a squarer room of the same area.
Place the bed head against a full-height wall or gable, not under a slope, with at least 0.6 m on the access side.
Finally, storage and circulation
Allocate storage only after the stair, bathroom, and main room are placed.
Keep a clear 0.9 m circulation path between the stair arrival, bathroom door, and main room door. If a door swing blocks it, switch to a sliding or pocket door rather than shrinking the landing.
Key Takeaway Sequence the layout as stair → bathroom → main room → storage → circulation. Draw head-height contours first, test furniture at 1:50, and place the bathroom against the soil stack. This order prevents the redesign loop that adds weeks and cost.
Step 5: Plan Loft Conversion Storage Ideas and Service Integration
Services are the invisible layout constraint: a room that looks perfect on plan can become unbuildable once you trace the soil pipe, water main, boiler flue, and electrical routes. Plan services before finalising room positions.
Let the soil pipe drive the bathroom position
A gravity-fed soil pipe needs a fall of roughly 1 in 40 to 1 in 110 depending on diameter and run length, and must connect to the existing stack below.
If the bathroom must sit further away, options are:
A pumped macerator system, which allows a smaller-bore pipe to run against the fall but adds noise, maintenance, and a power dependency.
A new stack run externally down a gable or rear wall, which needs building control approval and may affect permitted development.
Relocating the bathroom to a secondary position closer to the stack, and using the preferred position for a bedroom or study instead.
Trace the existing stack before drawing the bathroom, this single check eliminates most expensive surprises.
Water supply, heating, and boiler placement
Cold water can usually be extended with a new branch, but loft-level pressure is often lower than ground floor.
Heating options for a loft:
Extend the existing wet system with new radiators, which requires pipe runs up through the floor below and careful balancing.
Add a separate zone with its own thermostat, which is the most comfortable option but adds cost and controls.
Use electric panel heaters or underfloor heating mats, which avoid pipe runs but raise running costs.
If the boiler or cylinder is being replaced, place it where the flue can run to an external wall without crossing a bedroom, flue routes are heavily regulated and cannot pass through habitable rooms.
Electrical first-fix routes
Plan electrical routes before plasterboard goes on. Cables typically run along the ridge or down gable walls, then drop through stud walls or service voids. Minimise penetrations through the insulated roof plane, each is a potential thermal bridge and condensation risk.
Allow for:
Lighting circuits with a switch at the stair arrival and at each room door.
Socket outlets at 0.45 m above finished floor level on full-height walls, not on knee walls where they would be inaccessible behind furniture.
A dedicated circuit for a shower, if electric.
Ventilation: the most commonly under-planned service
A loft conversion needs continuous background ventilation plus local bathroom extract. Options:
Mechanical extract ventilation (MEV): a central unit ducted to bathroom and kitchen, terminating at a gable or roof grille. Ducts need a clear route and insulation to prevent condensation.
Positive input ventilation (PIV): a loft unit pushing filtered air into the home, simple, but not a substitute for bathroom extract.
Passive stack ventilation: relies on buoyancy and wind; less reliable in a well-sealed loft.
A bathroom extract fan should achieve at least 15 litres per second intermittent or 8 continuous, with the shortest, straightest duct run possible, every bend reduces performance.
Watch Out Do not route a ventilation duct through a cold eaves void without insulating it. Warm, moist air will condense inside the duct and drip back into the room or soak the insulation.
Storage that works with the services, not against them
Once services are routed, low-height and awkward spaces become storage. Build cupboards around duct runs and soil pipes rather than moving services, boxing-in is cheaper than rerouting.
Useful storage patterns:
Full-height cupboards on the gable end, 0.6 m deep, for hanging and shelving.
Low drawers under a 1.2 m knee wall, 0.5 m deep, for bedding and seasonal items.
A shallow linen cupboard above the stair arrival, using the headroom over the landing.
Coordinate with your structural engineer and building control
Before finalising the layout, share service routes with the structural engineer so steels and trimmers avoid ducts and pipes, then confirm routes with building control at design stage, not on site. A five-minute conversation at drawing stage is cheaper than moving a bolted-in steel.
Key Takeaway Place the bathroom within 3-4 m of the existing soil stack, plan electrical and ventilation routes before plasterboard, and build storage around services rather than moving services for storage. Services-led layout planning is the step most homeowners skip, and it is the one that most often forces a redesign.
Step 6: Navigate Planning Permission and Building Regulations
Most loft conversions need planning permission, though some qualify for permitted development rights.
Permitted development rights and when you need approval
Exceed these limits and you need planning permission, hip-to-gable, mansard, and roof extensions typically require it because they alter the roofline.
Check with your local planning authority first. Planning permission can take 8-13 weeks; under permitted development you can start once building control approves your design.
Fire safety, escape routes, and insulation requirements
Building regulations require fire-resistant doors, suitable escape routes, and fire detection.
Loft windows must be openable for emergency escape: at least 0.75 metres wide and 1.1 metres tall, positioned so you can climb out safely.
Insulation standards are strict: U-values of 0.18 W/m²K for the roof, 0.30 for walls, and 0.25 for floors.
Step 7: Follow the Loft Conversion Process Steps and Get Professional Support
Your loft conversion process steps require professional input. Attempting this alone creates legal and safety risks.
Structural assessment, architect, and building control involvement
Start with a structural engineer's assessment of your roof structure, load-bearing walls, and required modifications, £300-600 and 1-2 weeks.
Building control inspects at key stages, foundation, during construction, and completion, to check work meets regulations.
At Sd Architecture, we manage this entire process, coordinating structural engineers, handling planning applications, liaising with building control, and overseeing construction.
Timeline and construction oversight
A typical loft conversion takes 8-12 weeks on site. Planning permission adds 8-13 weeks if required, and budget 4-6 weeks for design and drawings before applying.
Planning a loft conversion layout requires careful measurement, realistic assessment, and professional guidance, the difference between a cramped conversion and a beautiful, functional space comes down to early planning.
Frequently Asked Questions
What should I consider before planning a loft conversion layout?
Before planning, assess head height (you'll typically need at least 2.2 metres of clearance), roof pitch (steeper pitches provide more usable space), and structural integrity. Check whether your roof has rafter or truss construction, trusses are harder to work with. Measure your floor joists to confirm they can support a habitable room. Consider access: where will the staircase go without consuming too much space below? Finally, understand permitted development rules in your area; some conversions don't need planning permission if they meet specific criteria.
How do I make the most of limited headroom in a loft conversion?
Maximise usable floor area by placing full-height rooms (bedroom, bathroom) in the centre where roof pitch is highest. Use the sloped edges under eaves for built-in storage, wardrobes, or shelving, furniture-scale planning around awkward roof geometry is essential. Consider a dormer or roof extension if headroom is severely restricted. Use rooflight and dormer windows for natural light and to make the space feel larger. Avoid bulky freestanding furniture; built-in solutions adapt better to angled ceilings and maximise the practical layout.
Where should I place the stairs in my loft conversion?
Staircase placement is a critical trade-off. Position the stairwell near the existing landing or hallway to minimise disruption to rooms below. Avoid placing stairs in the middle of your new space, they consume valuable floor area and create a landing that wastes headroom. Consider a spiral or compact staircase if space is tight. Ensure the staircase meets Building Regulations for escape routes and fire safety. The landing at the top must be sized correctly and positioned to allow door openings without blocking circulation. Work with a structural engineer to confirm load paths through existing floor joists.
What is the 10-year rule for loft conversions?
The 10-year rule relates to permitted development rights. If a loft conversion was completed more than 10 years ago without planning permission and has remained unchanged, it may be immune from enforcement action. However, this doesn't mean the original work was legal or compliant with Building Regulations. If you're planning a new conversion, you must follow current regulations regardless of age. Always check with your local authority whether a previous conversion was properly approved and certified by Building Control.
Get Started Today

Comments